-

- Home
- Developer Center
- Documentation SSIS Data Masking Components
- SSIS Help: Cache and Lookup transform


-
- Home
- Developer Center
- Documentation SSIS Data Masking Components
- SSIS Help: Cache and Lookup transform
Cache and Lookup example
Cache transform in SSIS
The "Cache Transform" transformation creates a reference dataset for the Lookup Transformation that will be used in cache, without writing onto disk. It writes data from a data source in the data flow to a Cache connection manager.
The Lookup transformation joins data in input columns from a connected data source with columns in the reference dataset and performs lookups.
Cache connection manager is most useful when you want to configure the Lookup Transformation to run in the full cache mode. In this mode, the reference dataset is loaded into cache before the Lookup Transformation runs.
The example below shows you how to use cache transform in SSIS.
1.First, you would need to create a new Data Flow Task

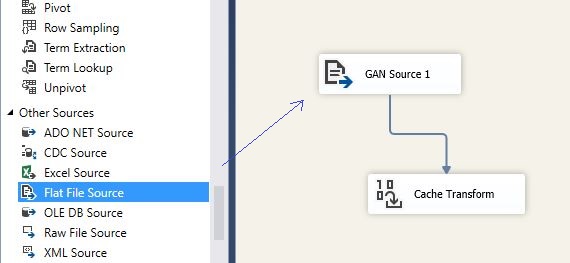
2.Get into the Data Flow tab, and create a data source. Let's use Flat File Source as data source in our example. Drag-and-drop Flat File Source component from the SSIS Toolbox into the Data Flow pane.
3.Now, let's configure a new Flat File Connection Manager by browsing onto the disk and selecting appropriate data source file that we already have prepared:
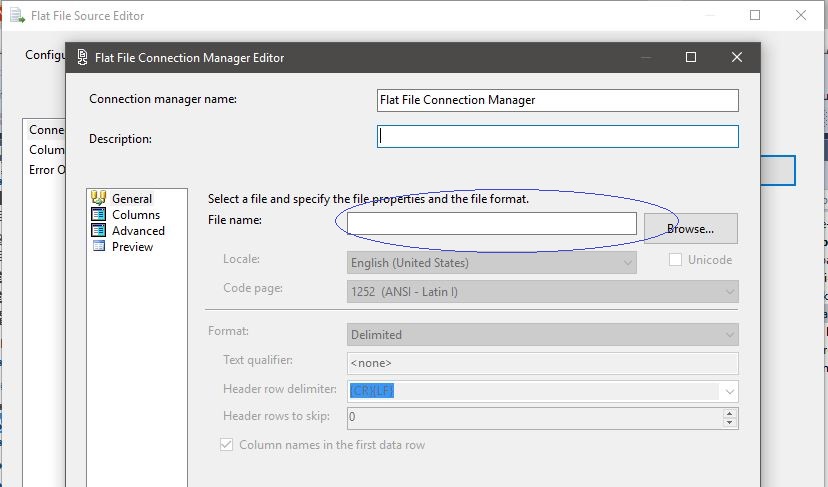
4.Source file must contain at least two fields. One will serve as an identifier, and we will use the id field for that purpose, and another is a data field with content. You can use source file similar to the one on the picture:

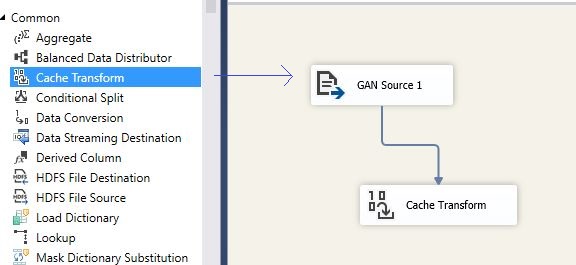
5.As you are done configuring the Flat File Source with all the appropriate fields definitions from the file, press OK. As the next step, you would drag-and-drop Cache Transform into the Data Flow pane. Connect Flat File Source with Cache transform, so that all the metadata is mapped between two components.
6.Double click the Cache's component to open its settings and click "New" button to create a new Cache Connection Manager.

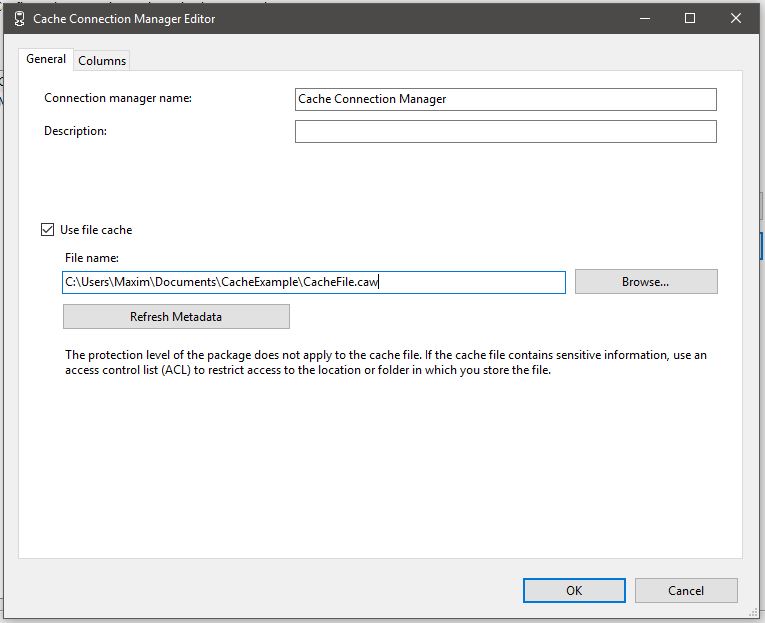
7.In the Cache Connection Manager Editor that just opened, select "Use file cache" option and browse to the file you created for the purpose of the exercise. Please, pay attention to the sensitive data warning as protection levels of the packages do not apply to the Cache component.
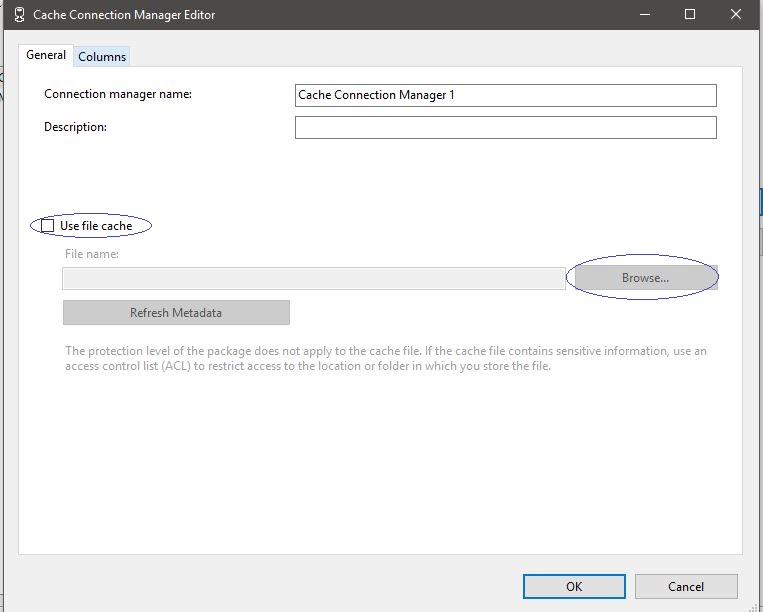
7.1.Click "Browse.." button and enter filename of the cache file in the proper folder onto your local drive.
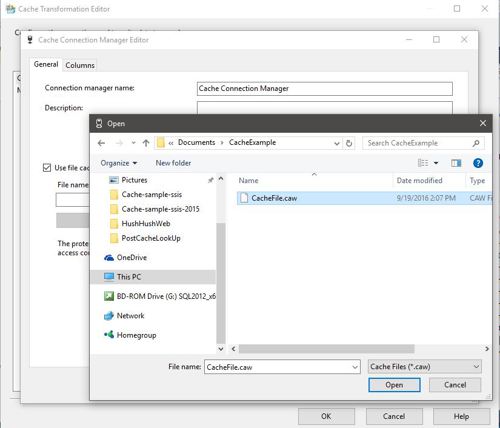
7.2.Press "Open" and make sure that you selected proper filename. Than press "OK".
8.Now, open the Cache Transformation Editor ( by single clicking on the component) ,navigate to the Mappings tab and connect input and destination columns:
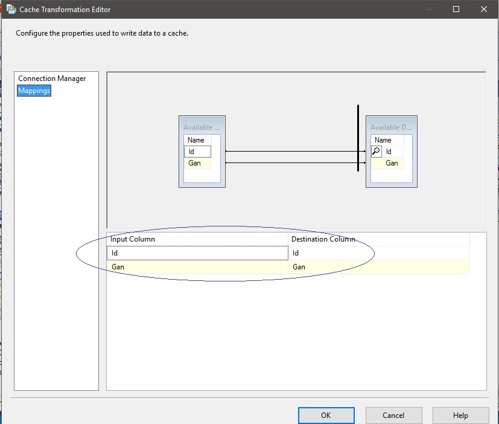
8.1.Press "OK". Check all the steps for the correct input and now you can run the package.

8.2. If everything is OK, let`s see the cache local file.

Be careful, as you can see cache data can be read without any decoding.
Congratulations! You have successfully configured the Cache transform.
Lookup transform in SSIS
The Lookup transformation performs lookups by joining data in input columns with columns in a reference dataset. You use the lookup to access additional information in a related table that is based on values in common columns. The reference dataset can be a cache file, an existing table or view, a new table, or the result of an SQL query. The Lookup transformation uses either an OLE DB connection manager or a Cache connection manager to connect to the reference dataset. Let`s see how Lookup transform works in ssis.
1.First, create a new Data Flow, drag-and-drop a new Data Source (Flat file source), and configure a new connection manager.

2.A data file looks similar to the one on the picture. It must be contains at least two fields: id and another data field.

3.Next, you need to drag-and drop Lookup transform from the SSIS Toolbox and connect it to the data source.

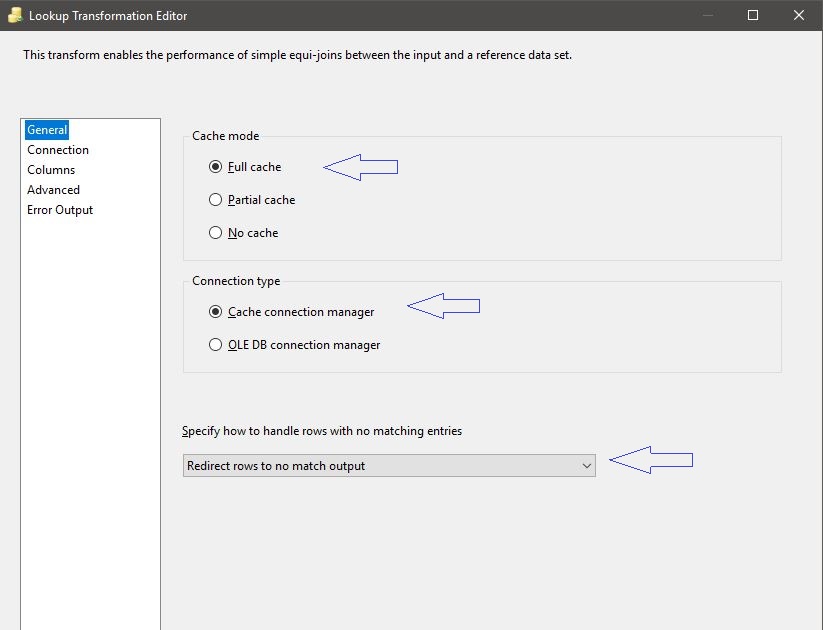
4.Now open the settings (double click on the icon) of the component. Select the Cache mode to be "Full Cache" and the Connection type to be Cache connection manager.
Also you can handle rows with no matching entries. Open drop-down list and select "Redirect rows to not match output" in the bottom of the window.
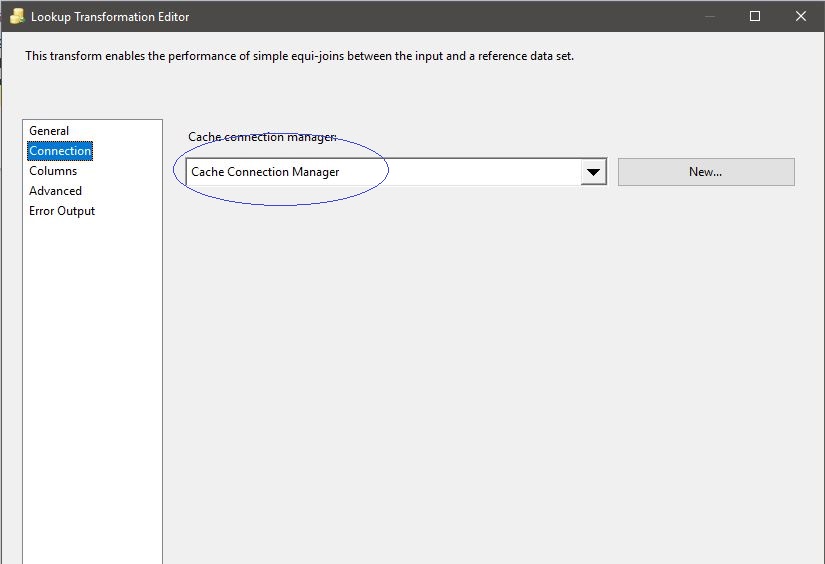
5.Navigate to the connection tab and select from the drop-down list "cache connection manager"
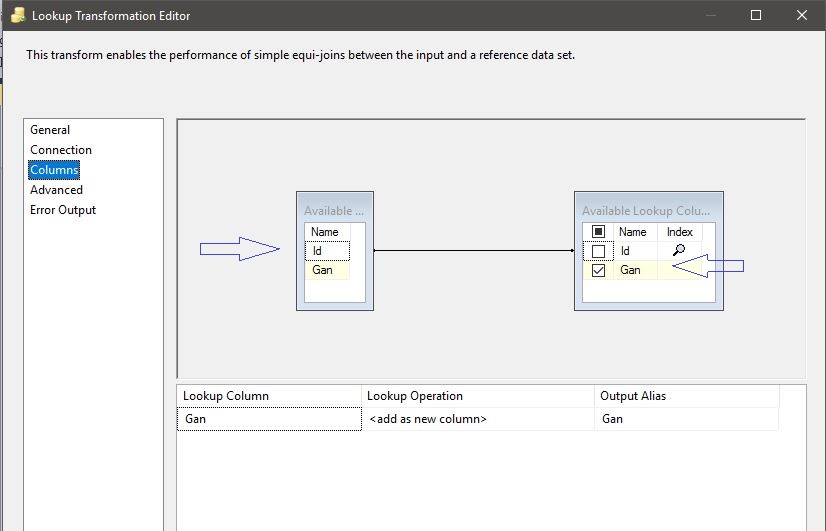
6.Now open the columns tab and connect id fields together, then choose at least one data column.
7.After all steps before this you need to create two Destinations (Flat file destination) and create referenced connection managers.
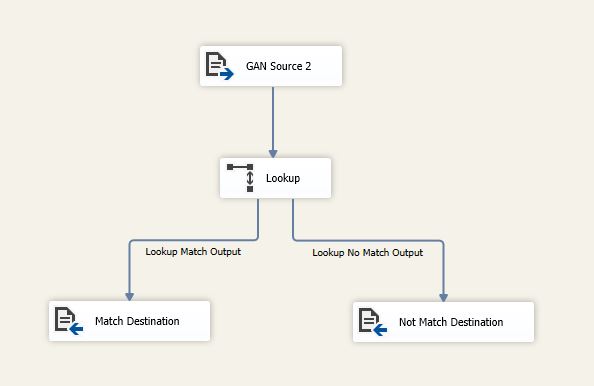
8.Connect it to the Lookup transform according to outputs to right places.
Congratulations! You successfully configured Lookup Transform.
SSIS Help: Cache and Lookup transform
 Download Manual